

A Behind-the-Scenes Look from Our Cambridgeshire Workshop
There is something satisfying about watching a piece of raw timber become a finished, functional object. In this post, we walk through exactly how we handcraft a personalised wooden chopping board. From selecting the oak through to the final oil finish in our Cambridgeshire workshop.
If you are curious about the process, considering a bespoke chopping board or simply enjoy a good workshop story, this one is for you.
Step 1: Choosing the Right Oak
Every board starts with a piece of FSC-certified white oak. We choose white oak for good reason. It is naturally moisture-resistant, long-lasting and less prone to warping than many other timbers. Its natural oils and tannins also help reduce bacteria on the surface, making it a practical and safe choice for food preparation.
On top of that, white oak has a beautiful, rich grain that develops more character with age. When looked after properly, a solid oak chopping board can last for decades.
Step 2: Cutting, Shaping and Preparing the Board
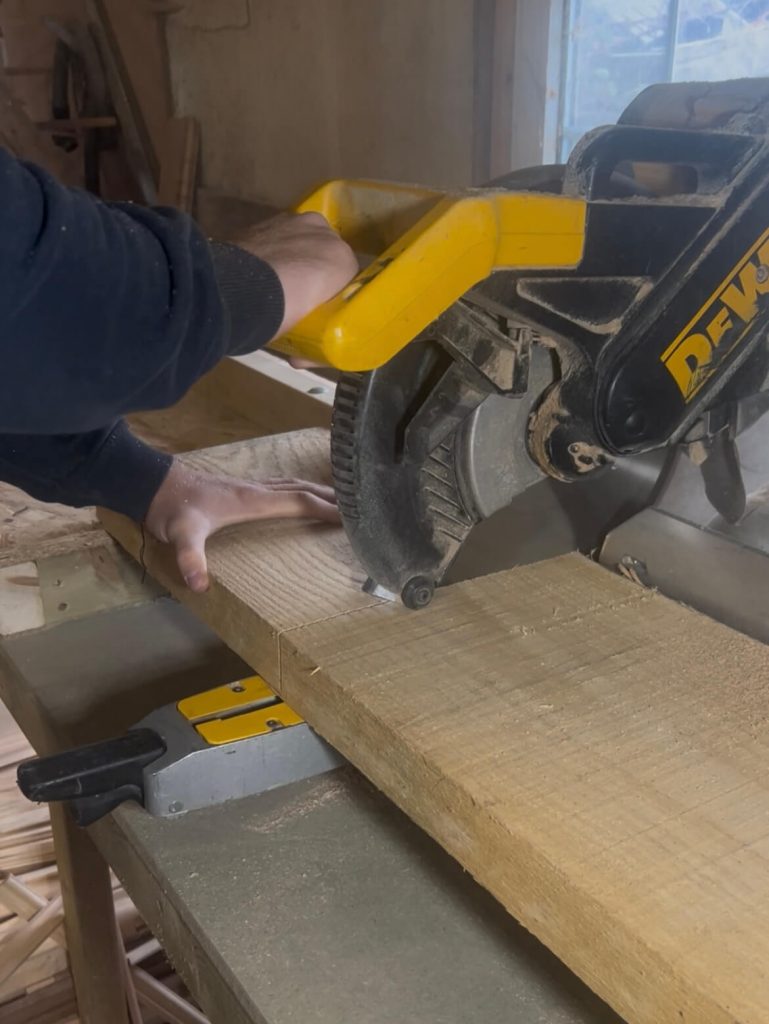
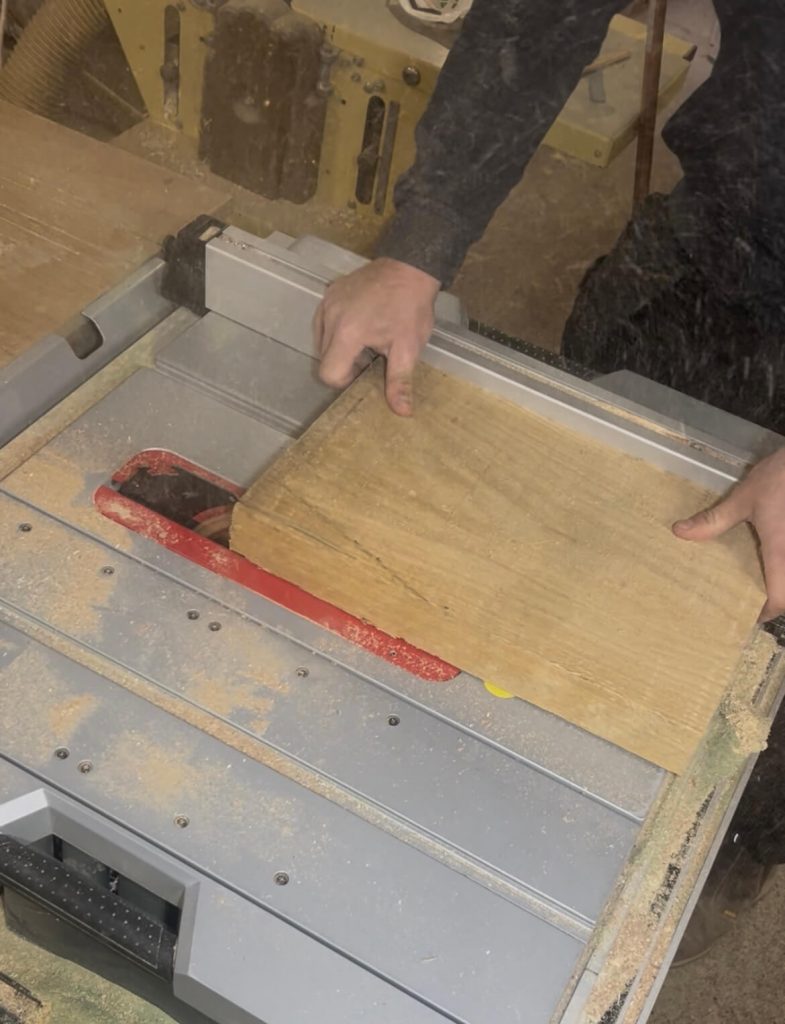
Before any engraving begins, the oak needs careful preparation. We cut the timber to size, in this case a medium board at 40cm by 25cm, and plane it to a thickness of 4cm. This gives the board a solid, balanced feel.
Once the surface is planed and the edges are cut clean, the board is smooth, level and ready for the next stage. This preparation stage matters more than it might seem. An even surface is what allows the CNC engraving to sit crisply in the wood.

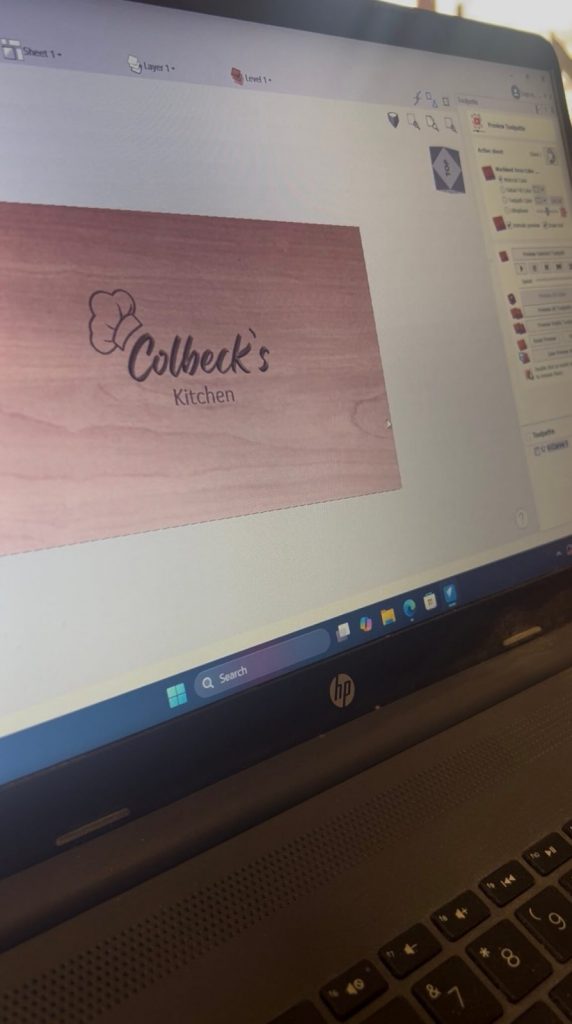
Step 3: Designing the Personalisation
Next, we move to the design stage. Using VCarve software, we map out the layout, engraving depth and toolpaths for the customer’s chosen text and artwork. Once the digital preview looks balanced and the spacing feels right, the file goes to the CNC machine.
Getting this right means the finished engraving looks clean and well-proportioned rather than rushed or misaligned.
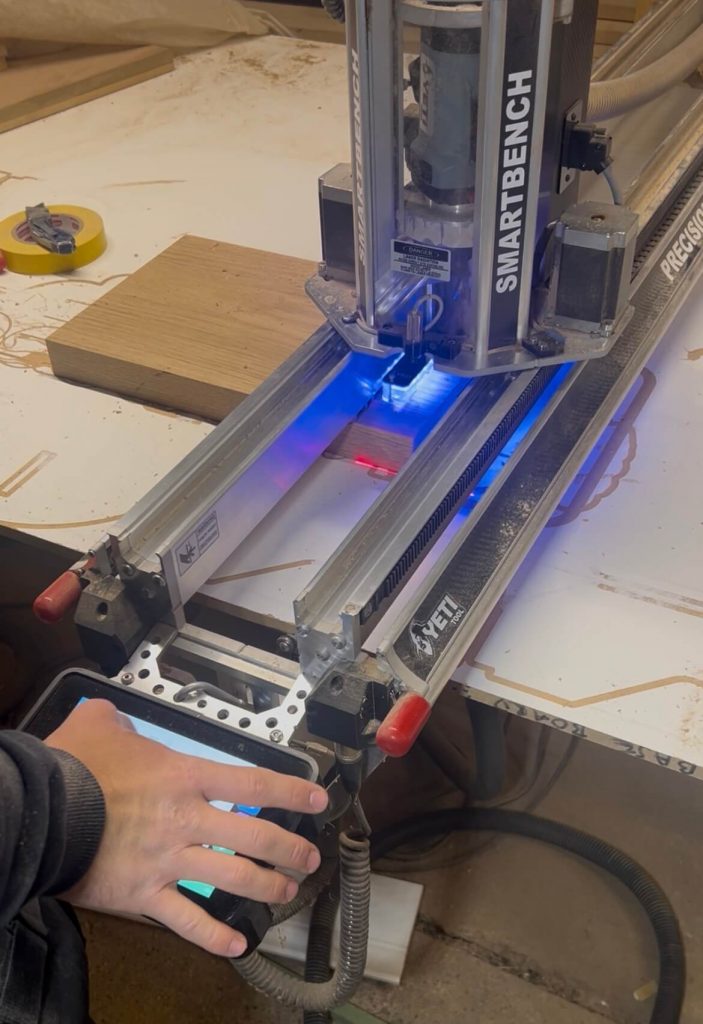
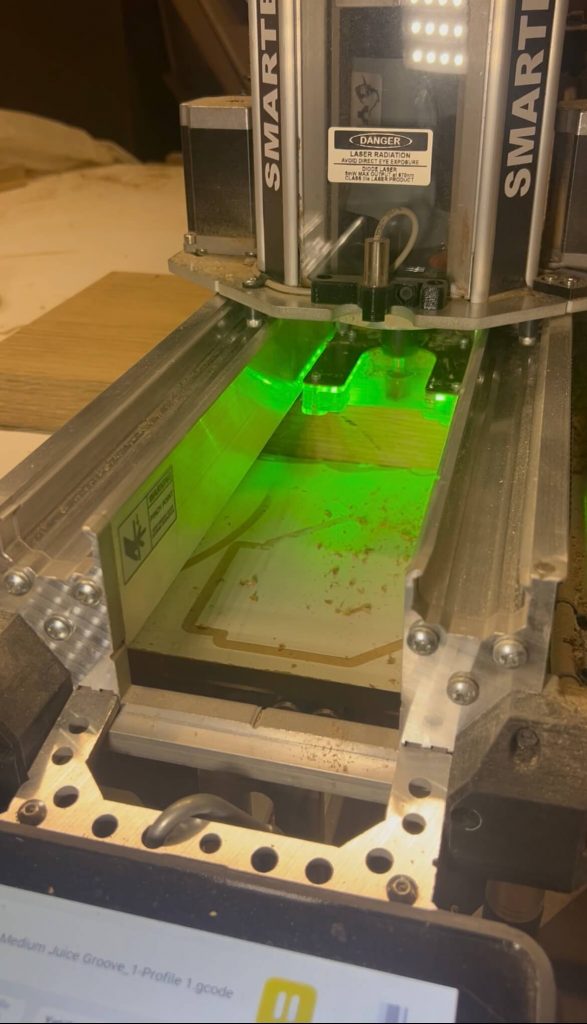
Step 4: CNC Engraving the Board
We secure the board to the CNC bench using strong double-sided tape so it stays perfectly still throughout. Then the carving begins.
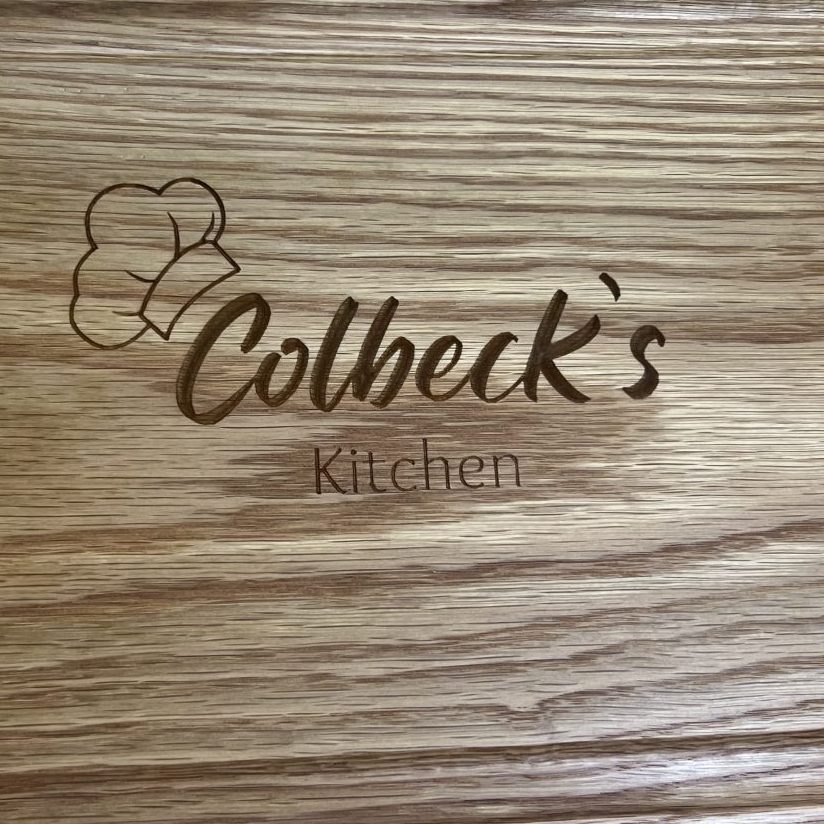
First, we run the toolpath that cuts a clean juice groove around the edge of the board. A juice groove catches liquid during food preparation and also gives the board a more defined, finished appearance. Many customers choose to include one for both practical and aesthetic reasons.
Then we change the toolbit and begin engraving the personalisation. The CNC machine carves the customer’s design into the oak with precision. Even after doing this many times, watching the design appear in the grain of the wood is still one of the most satisfying parts of the process.
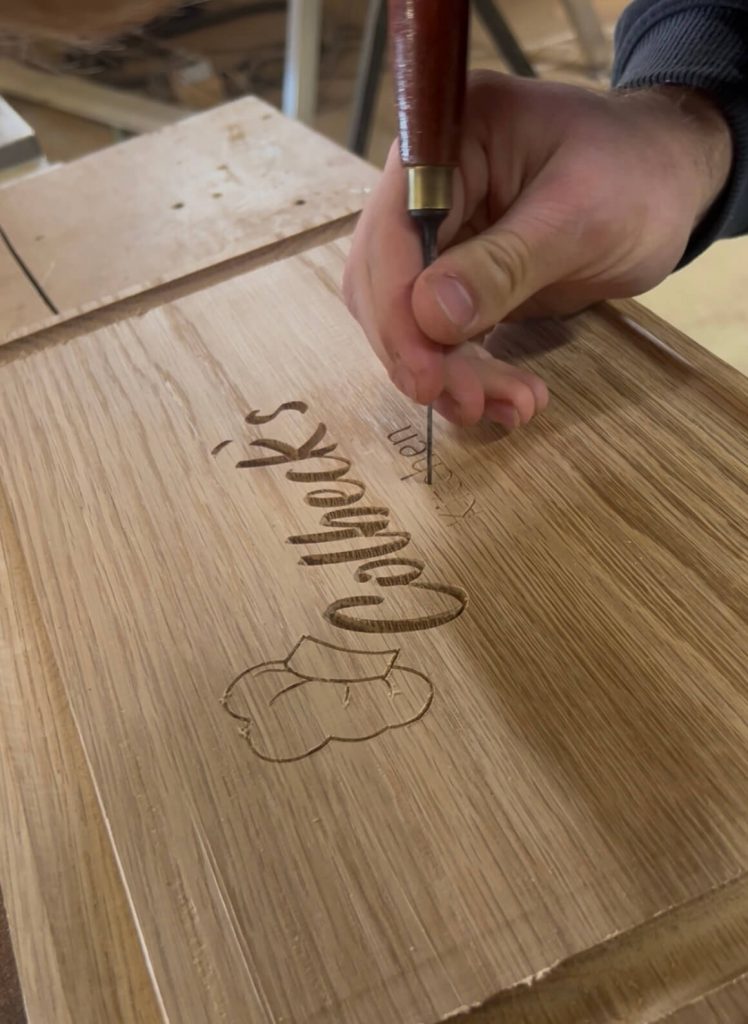
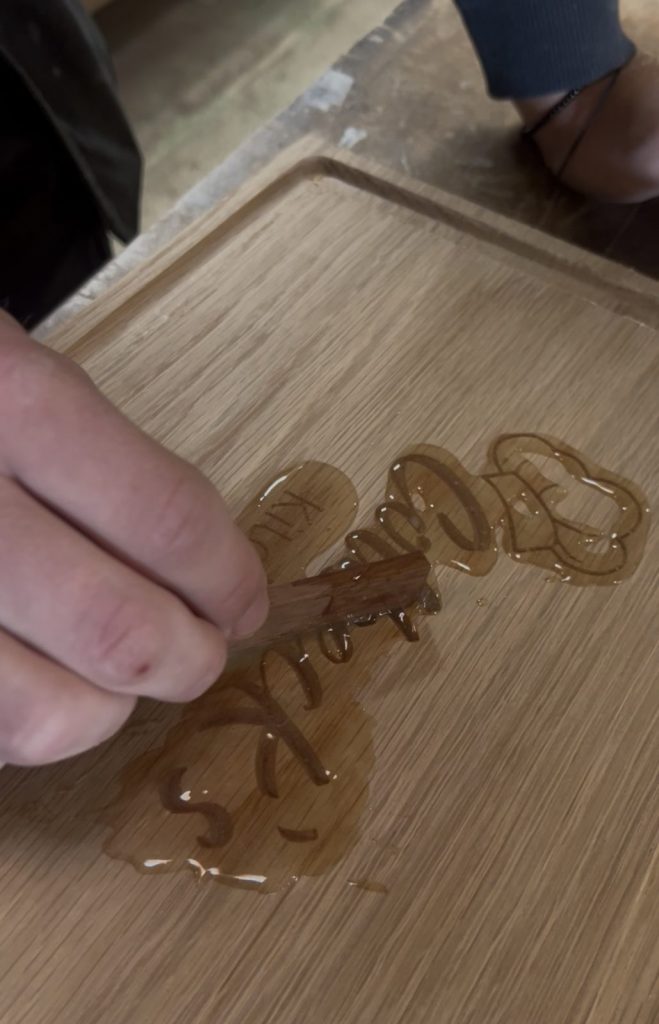
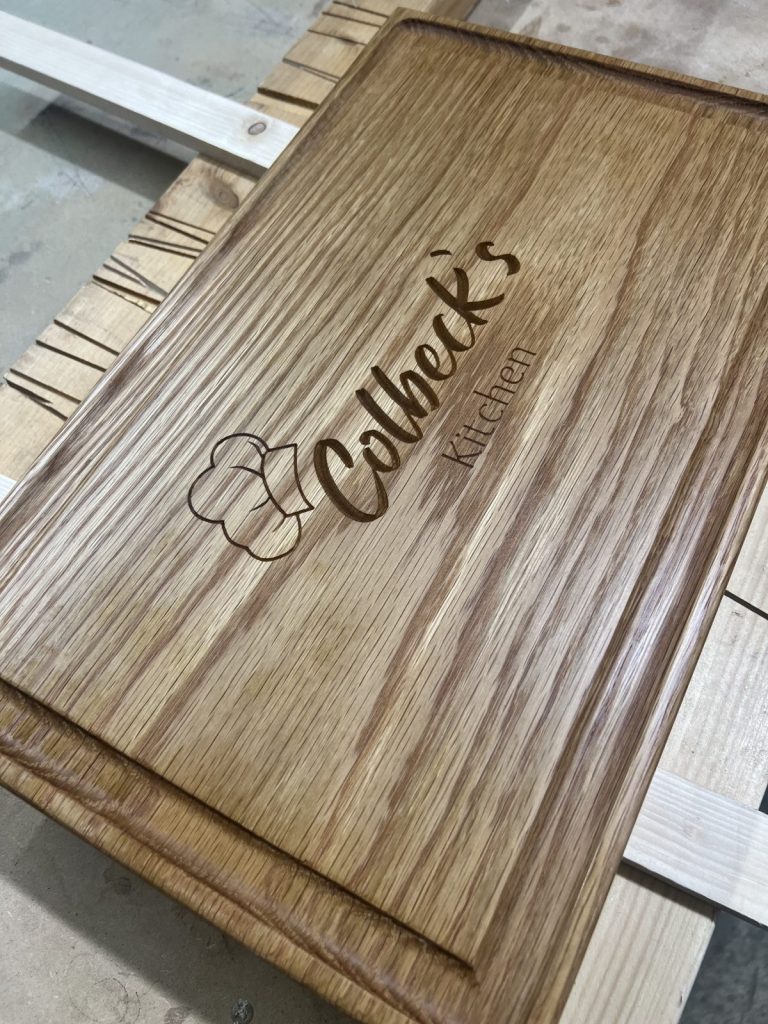
Step 5: Filling the Engraving With Food-Safe Resin
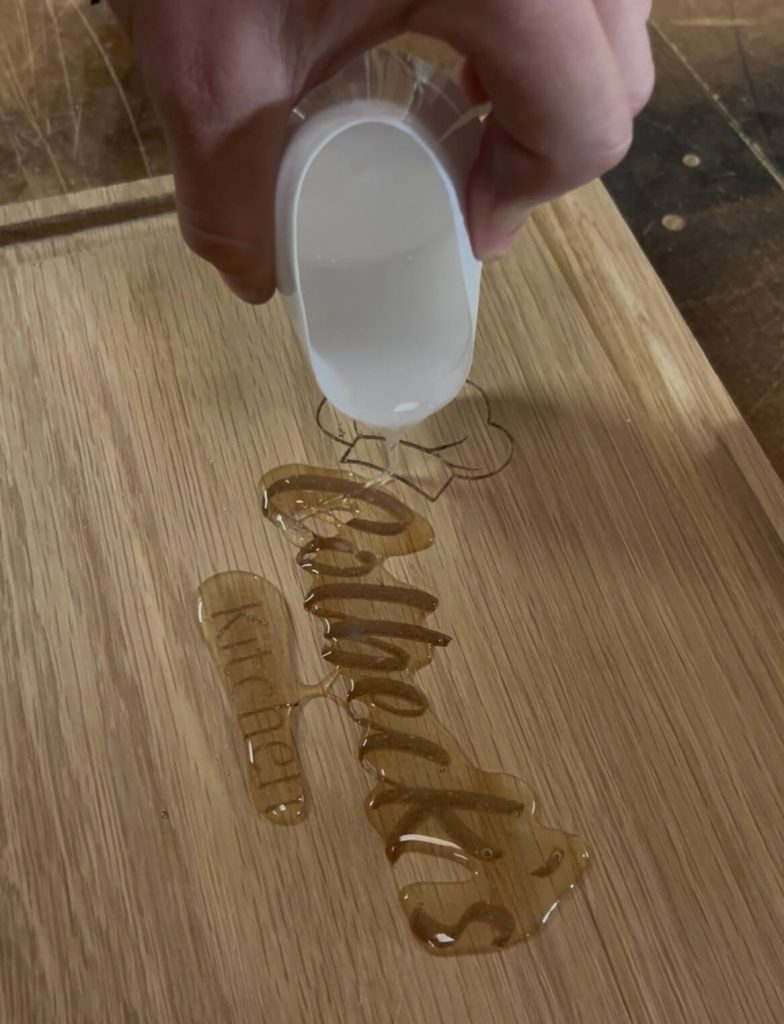
Once the CNC engraving is complete, we fill the design with a clear, food-safe resin. This seals the engraved areas so that moisture and oils cannot work their way into the carved sections over time. It also keeps the lettering and artwork looking crisp even with regular use.
We pour the resin carefully into the engraved sections and leave it to cure for at least 24 hours. After that, we return the board to the CNC machine to shave away the thin layer of excess resin. As a result, the resin sits perfectly flush with the surface before sanding begins. Doing this mechanically rather than by hand means every fine detail stays sharp and precise.
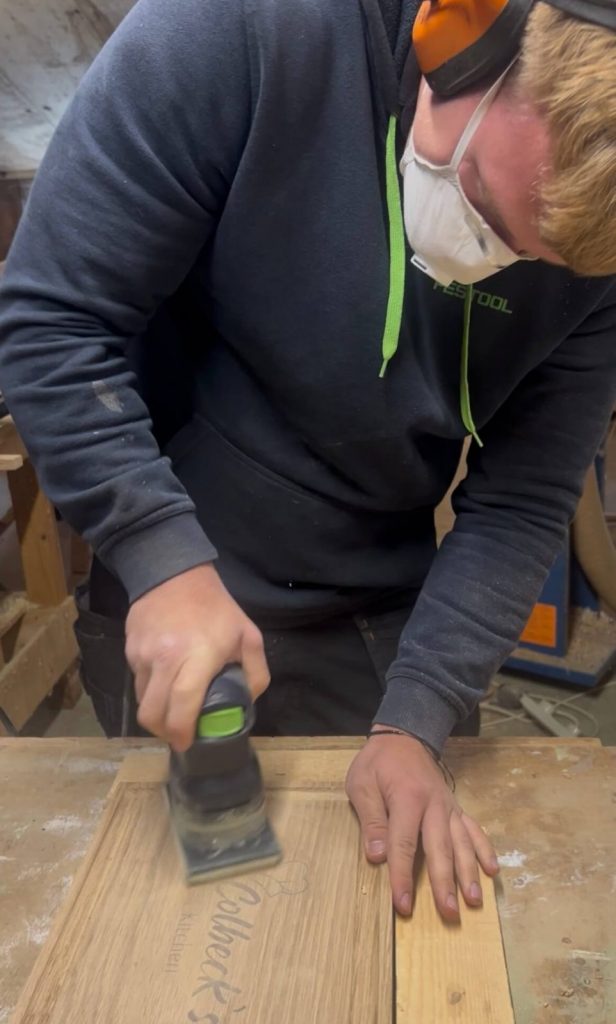
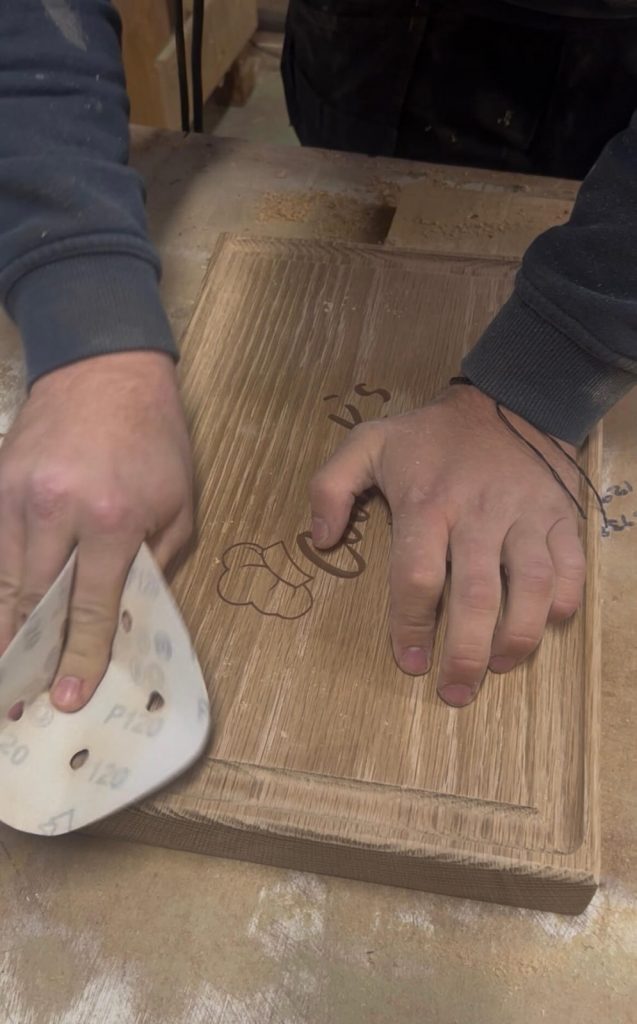
Step 6: Sanding
Fresh CNC cuts leave sharp edges, so the board goes through a thorough sanding process. We use belt and orbital sanders to keep the surface even. The finer areas, like the juice groove and engraved sections, are finished by hand where needed. Finally, we soften the edges using a router so the board feels comfortable to hold and use.
This is the stage where the board really starts to feel finished. The oak becomes smooth to the touch, the engraving becomes clean and the whole piece takes on the feel of something properly handmade.
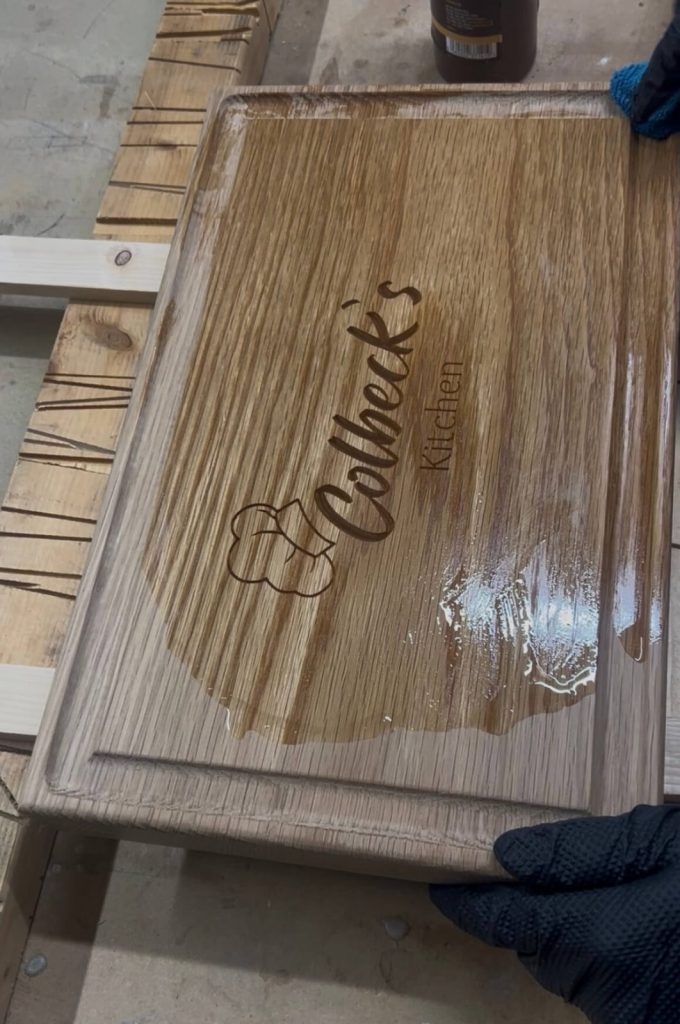
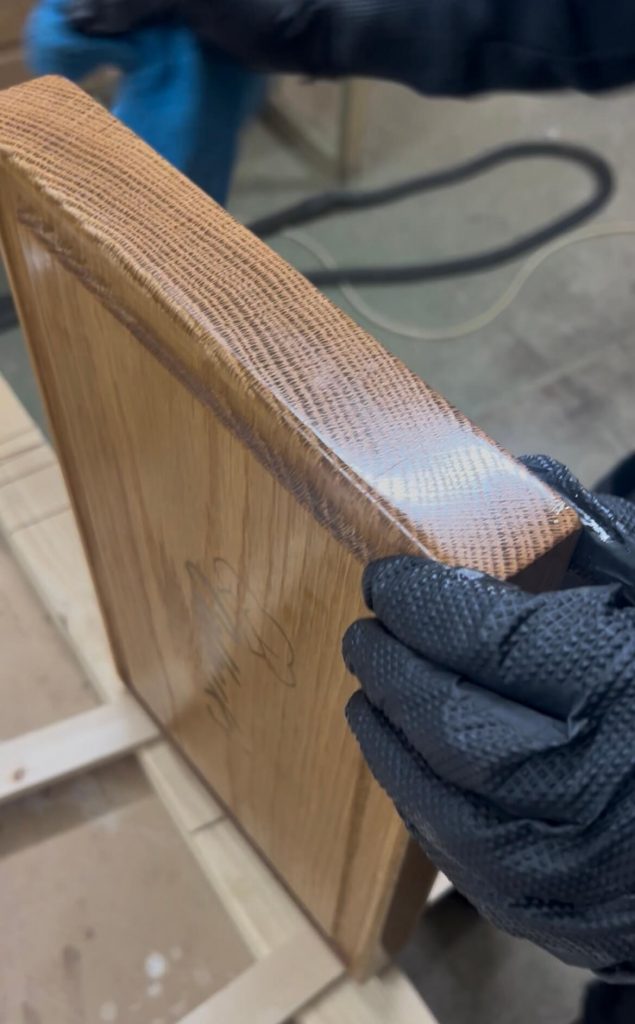
Step 7: Finishing with Food-Safe Oil
For the final stage, we treat the oak with food-grade chopping board oil. The grain deepens in colour, the engraving becomes richer and the oak takes on a warm, natural sheen. It is a simple step but it makes a noticeable difference to how the finished board looks and feels. Every board also comes with a care card covering how to clean, oil and maintain it so it lasts for years.
The customer who commissioned this particular board left us this review:
“Very happy with my personalised chopping board. Very thick, heavy and I was updated at every stage. Great customer service, excellent delivery and very well packaged. Definitely recommend.”
Thinking About a Bespoke Chopping Board?
If this post has given you a sense of how much care goes into each board, you can find out more about our bespoke wooden chopping boards. They are made to order in our Cambridgeshire workshop and shipped across the UK.
Every board is made to your size and specification, from the timber and style through to the personalisation and finish. If you have a specific idea in mind, just get in touch and we will work through it with you.
Leave a Reply